 PoBot
PoBot
 Simple LCD with I2C module on Arduino
Many liquid cystal displays hacked in garbage stuff have their own controller and even more their own communication protocol, making hard to reuse them.
Nowadays it’s cheaper to buy a specific module that controls a common LCD chip such as Hitachi HD44780. For less than 30 € you have a LCD 2x16 + the I2C board that allows your computer or your robot to display text without extra pins.
This price is cheap because of the large Arduino community that buy dozens of these circuits per week. Even in France where Zartronic sells a backlight blue & white LCD + I2C module at only 15 €.
Module I2C/TWI LCD chez Zartronic (FR)
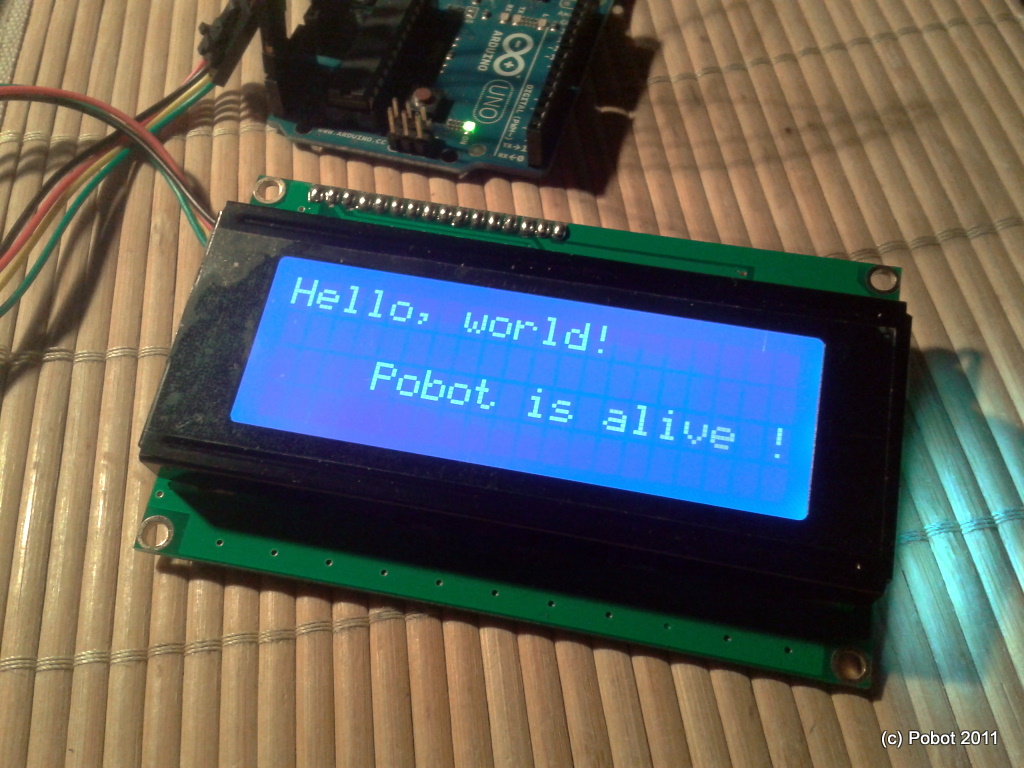
You may also have bought the 20x4 version from China :
Ecran 4x20 avec module I2C chez B2cqShop (CN)
It needs a little bit more explanations in order to work, but before the end of this review everything will be clear for you and your Arduino will work as well as ours :
Hardware
The LCD has the well-known Hitachi HD44780 with parallel control. It is soldered on a small circuit with a PCF8574 that handles I2C communication.
This PCF8574 is just a 8 bit I/O extender through TWI or I2C protocol such as the one in a AVR microcontroller and of course the Arduino that is used during our workshops.
It means also that all the control of the cursor and character control has to be made in the software embedded in the master controller.
Concerning the package, it’s only a few millimeters thicker than the LCD alone. There is a useful 4 pins connector for I2C (and another one if you need to connect something else on the bus), and an adjustable for the contrast control.
Just connect the ground and the voltage (5V) to the Arduino then the data SDA on ANALOG 4 and clock SCL on ANALOG 5. In fact these pins are also digital for the TWI hardware inside the micro-controller of Arduino.
You can’t connect the I2C bus elsewhere, or you have to develop a software I2C library that consumes ressources.
BEWARE !
If you intend to use an Arduino Mega (or any controller with a different chip than ATmega8 ou 168 et 328 as standard Arduinos), you may check what pins have the SDA and SCL signals.
Pin mapping of the ATmega2560 for Arduino Mega
Thus, some extension shield will be useless because they don’t connect the I2C pins of the Arduino Mega.
Software
I²C address
The I2C slave address is 0x27 (in 7 bits mode) : check that no other element connected to the bus already use this address. But it is better to test once without anything on the bus else that the master (Arduino) and only one slave.
In the datasheet of the PCF8574 chip is explained the way the address can be customized. On the board, the three pins as its lower bits are set to 111, and since the fixed part is 0100, the address is 010 0111 or 0x27.
If you don’t use an Arduino or a chip with a 7 bits address, add the 0 (write) or the 1 (read) at the end. Thus the address is 0100 1110 (0x4E) or 0100 1111 (0x4F).
Included software
The LCD I2C module is given with a zipped archive with an Arduino called "Liquid Crystal I2C". It has been tested successfully under Windows with software version Arduino 0021.
Almost all functions of the official Arduino LCD API are present, at least the essentials.
– constructor (LiquidCrystal_I2C) with address, columns and rows
– initialization : init
– light : backlight, noBacklight
– writing text : print
– cursor position : setCursor
Note : "println" does not seem to work (bad character put at the end of your text, not a line feed). But you can add it since all LCD operations are to be implemented in the master code, the PCF8574 handles just the conversion of signals from serial to parallel.
First test
Very simply :
#include <Wire.h>
#include <LiquidCrystal_I2C.h>
LiquidCrystal_I2C lcd(0x27,20,4);
void setup()
lcd.init();
lcd.cursor_on();
lcd.blink_on();
lcd.backlight();
lcd.setCursor(0,0);
lcd.print("Hello, world!");
lcd.setCursor(4,2);
lcd.print("Pobot is alive !");
delay(1000);
lcd.cursor_off();
lcd.blink_off();
void loop()
But it counts 2836 bytes, since the library has a lot of work to do.


