 PoBot
PoBot
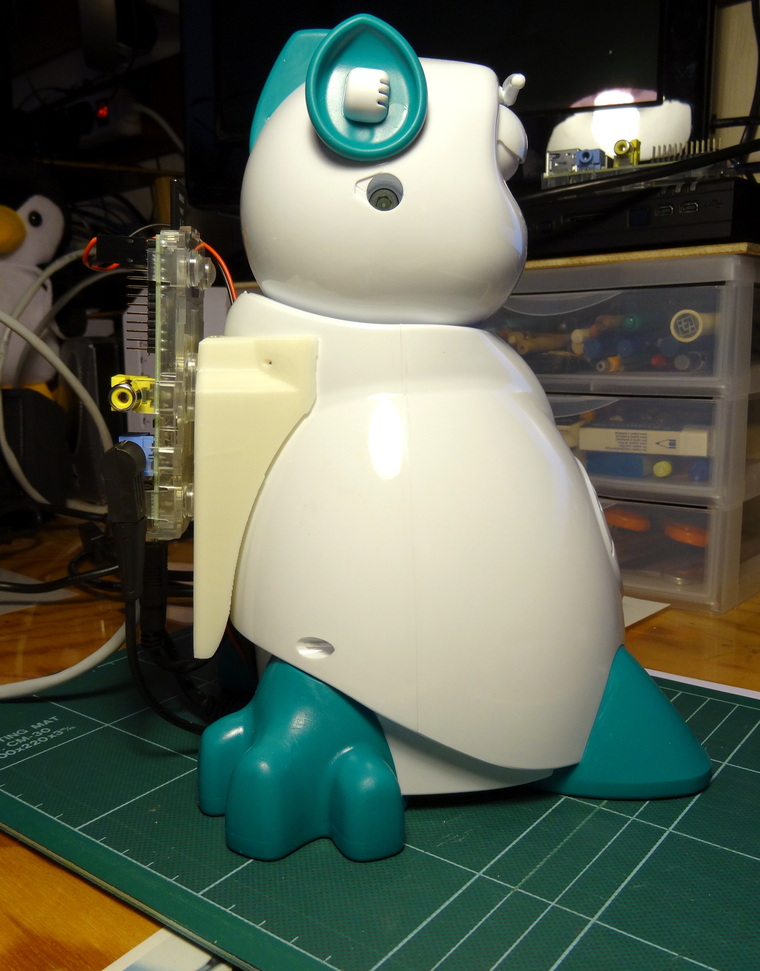
 Improving the RasPi fixture
The Raspberry is packaged in its usual clear acrylic enclosure, attached to Aisoy’s back with a 3D printed fixture. A couple of remarks must be made about this assembly, and it deserves some improvements to save you some trouble.
You could notice that I wrote the word "attached" in italics, since it’s not really attached. The attachment consists only in two columns about 20mm long, which gi inside the holes for the top two screws closing the back cover. This has several weaknesses:
- fragility
- lack of retention
- wrong position
Strengthening the columns
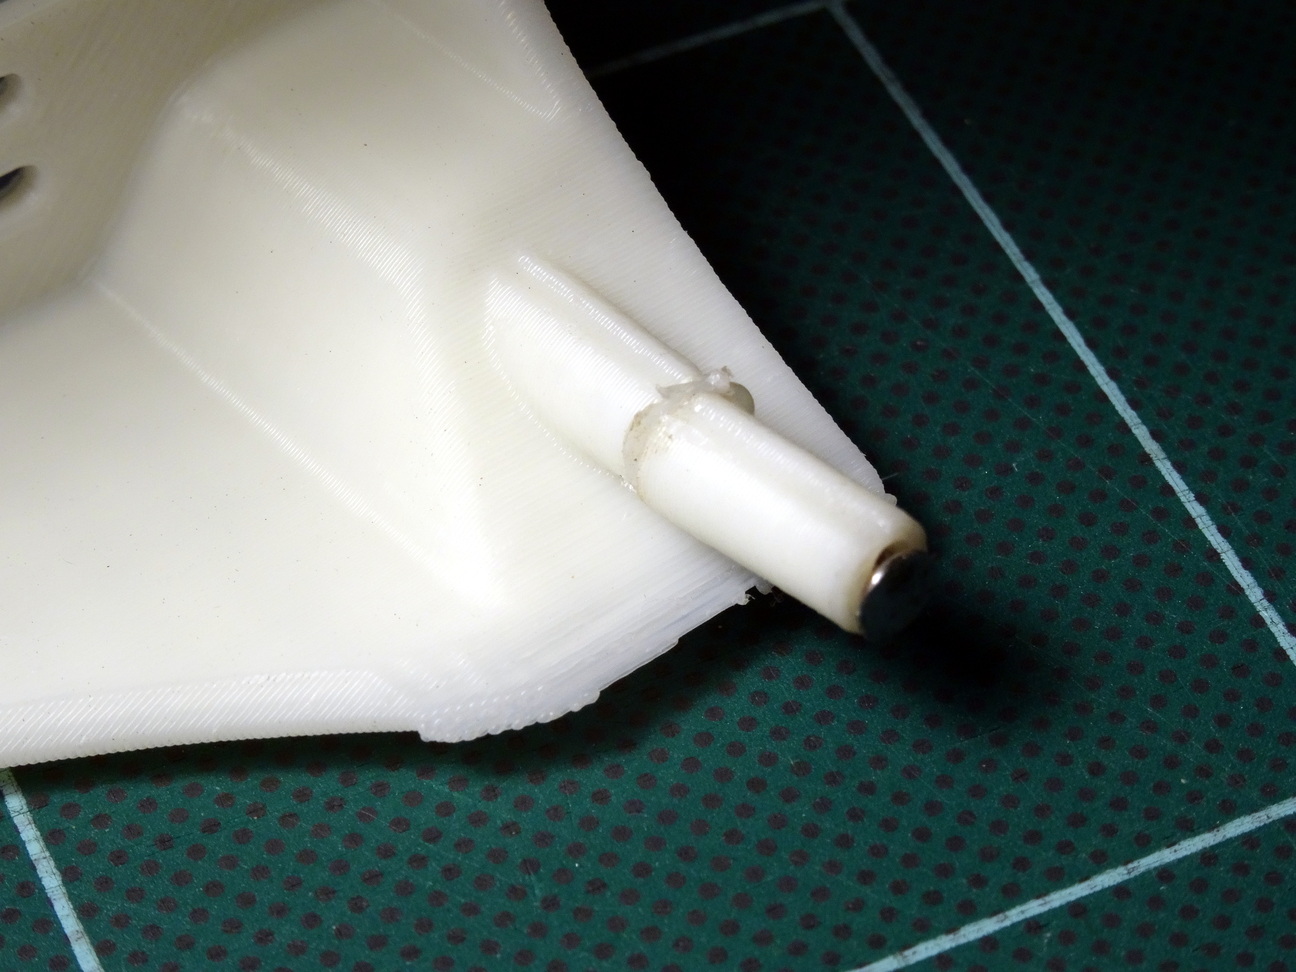
As expected, one of them broke quickly, and I can ensure you that I have manipulated the whole thing very carefully. This could be expected since their diameter is about 3 or 4mm and they have a central boring all along. The remaining material section is thus very reduced. Adding the fact that the Z resistance of 3D printed parts is not that good to the geometrical characteristics of the part makes its sturdiness close to nothing.
I tried to glue the pieces together, but nothing has worked, including hot gluing.
As expected a very small stress was enough to break the repair. Anyway, the other column is a good candidate for breaking sooner or later (and more probably sooner than later).

One simple solution is to reinforce them by an internal armature. Don’t be afraid, a simple small nail does the job. You just have to drill the existing hole at the diameter of the nail (minus a bit so that the nail will stay in place without gluing or alike) and to insert it gently. Nothing more.
The proof in picture here :
I agree I could have remove the nail’s head, but since it will be down hole when the backpack will be in place, who cares.
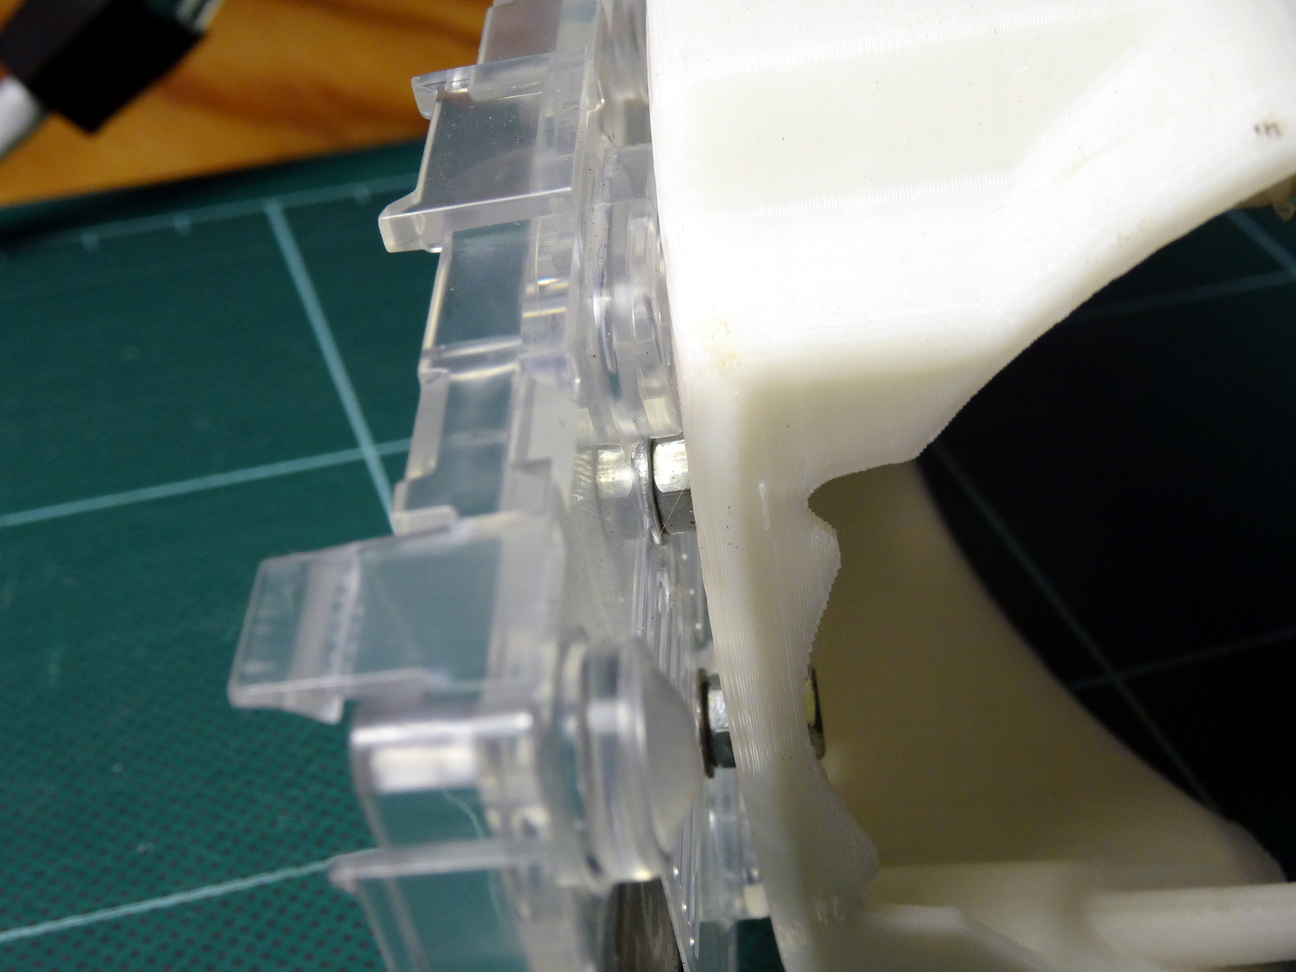
The RasPi enclosure fixture
This is not at the top neither :/
There is a single bolt, tightened quite strongly so that the rubber feet of the enclosure grip the fixture enough. No need to say that the fixture does not appreciate this that much, since no spacer or alike has been inserted to fill the gap caused by the enclosure feet height. In addition, despite the tightening, connecting or removing cables was enough stress to have the RasPi spin.
So, we replace the single bolt by two guys, adding a nut as spacer between the fixture and the enclosure. A couple of washers are added at the right places to preserve the plastic when tightening the assembly. Adding the extra nut has several benefits:
- acting as a spacer
- letting the bolt stay in place [1] whenever it is required to disassemble the assembly
While doing this, remove the rubber feet which widen the gap between the enclosure and the fixture, and are by the way completely useless now.
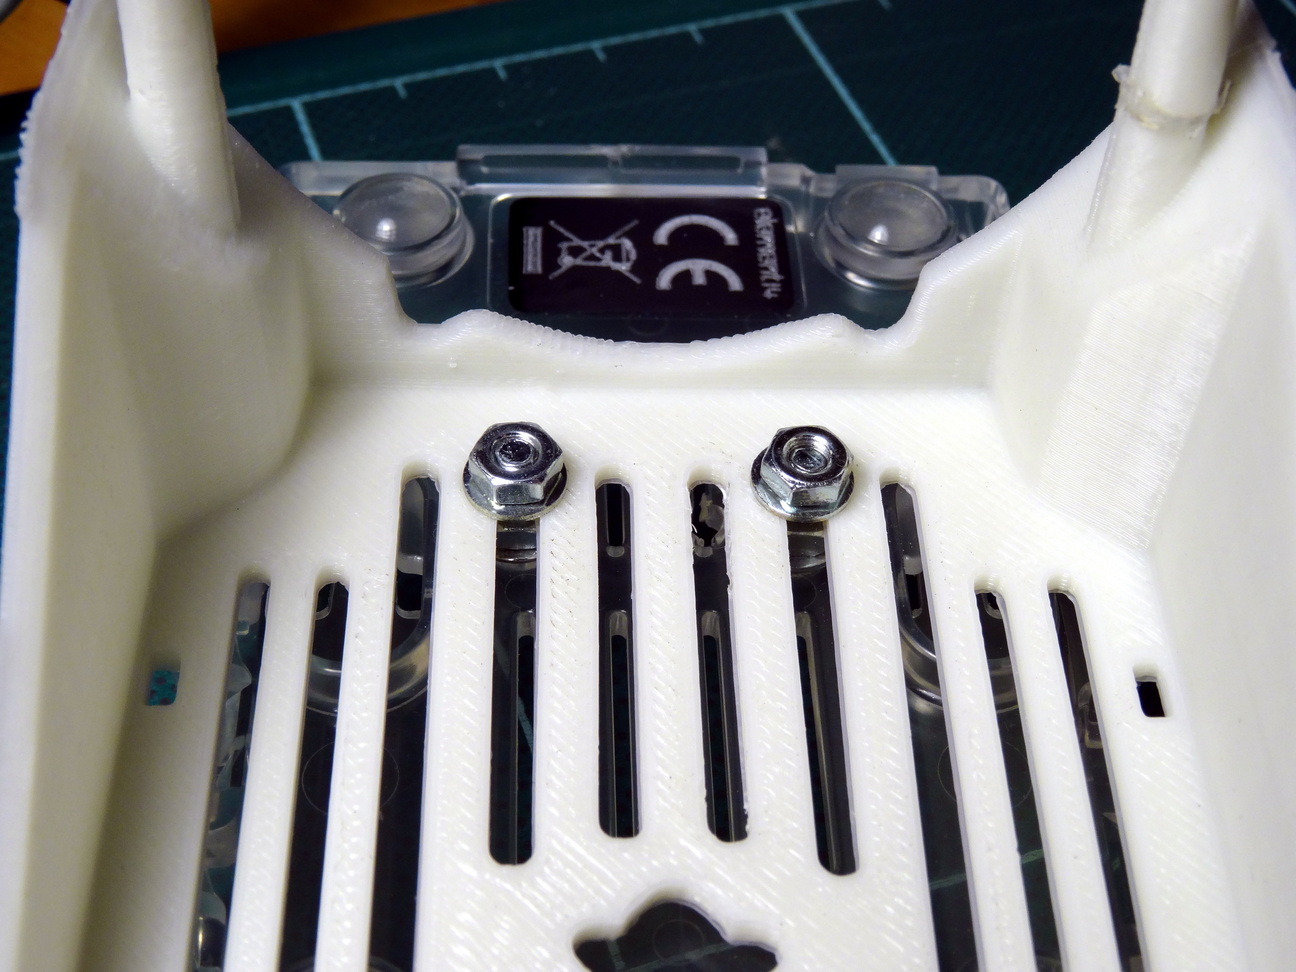
Wrong position of the RasPi
It is located too low, and make cables be in contact with the plane the Aisoy sits on. Either the Aisoy will have its back feet above the ground, or you will have to strongly bend the cables, hence applying a lot of stress on the sockets and assemblies.
So while at replacing the original bolt, we drill two new holes so that the RasPi is mounted the highest possible.

The cables have more space now.
Anyway, hikers will always say you that a backpack must be carried high so that not ruin your back :)
Improving the overall retention

Since the columns are simply inserted in the holes of the back cover, each time you turn the Aisoy upside-down to turn it on or off, all parts go on their own.
Adding a small piece of adhesive tape to make them a bit thicker will help having all parts stay gently attached when moving our friend around.
Conclusion
A thing to be done in priority is to consolidate the columns. While you’re there, all the other mods documented here will not take you very much time, and later you’ll be happy to have done them.
I hope Aisoy’s fathers will soon revise this part of the baby so that to fix the mentioned weaknesses.


